If you have not already heard, Vettabase is now a partner of MindsDB, working on improving MySQL compatibility.
In this post we shall take a look at getting started with MindsDB by connecting to MySQL and some of the improvements to date.
We have a ready to go example environment which will run MindsDB and MySQL in two separate Docker containers. We will be creating a new database user for MindsDB to connect, creating a database connection, and running a couple of queries to test the connection.
Example Environment
I have prepared the example environment, using Docker Compose:
You can either clone the example repo with git, or download and extract a zip file of the repository from Github.
From the root of the directory, we can start the containers:
docker compose up -dNOTE: The MindsDB image is quite large, around 8GB at the time of writing. The image itself has the tag, lightwood, and AutoML framework.
Run docker ps to see the running containers
$ docker ps
CONTAINER ID   IMAGE             COMMAND                  CREATED          STATUS          PORTS                                             NAMES
54cbac9642d7   mysql             "docker-entrypoint.s…"   11 minutes ago   Up 11 minutes   3306/tcp, 33060/tcp                               vettabase-mindsdb-intro-mysql-1
6cfe06520b07   mindsdb/mindsdb   "sh -c 'python -m mi…"   11 minutes ago   Up 11 minutes   0.0.0.0:47334-47335->47334-47335/tcp, 47336/tcp   vettabase-mindsdb-intro-mindsdb-1
The MySQL container will automatically load the SQL in data/sample.sql to create the schema named sample and the test_table table.
Let’s also perform a quick check to see if all the data was loaded into MySQL by counting the rows and performing a sum on the two columns:
$ docker exec -it vettabase-mindsdb-intro-mysql-1 mysql sample -uroot -pSuperPass123 -e "select count(*) as c,sum(total) as t,sum(value) as v from sample.test_table;"
mysql: [Warning] Using a password on the command line interface can be insecure.
+----+------+------+
| c  | t    | v    |
+----+------+------+
| 10 | 6146 |   94 |
+----+------+------+
MindsDB User Interface
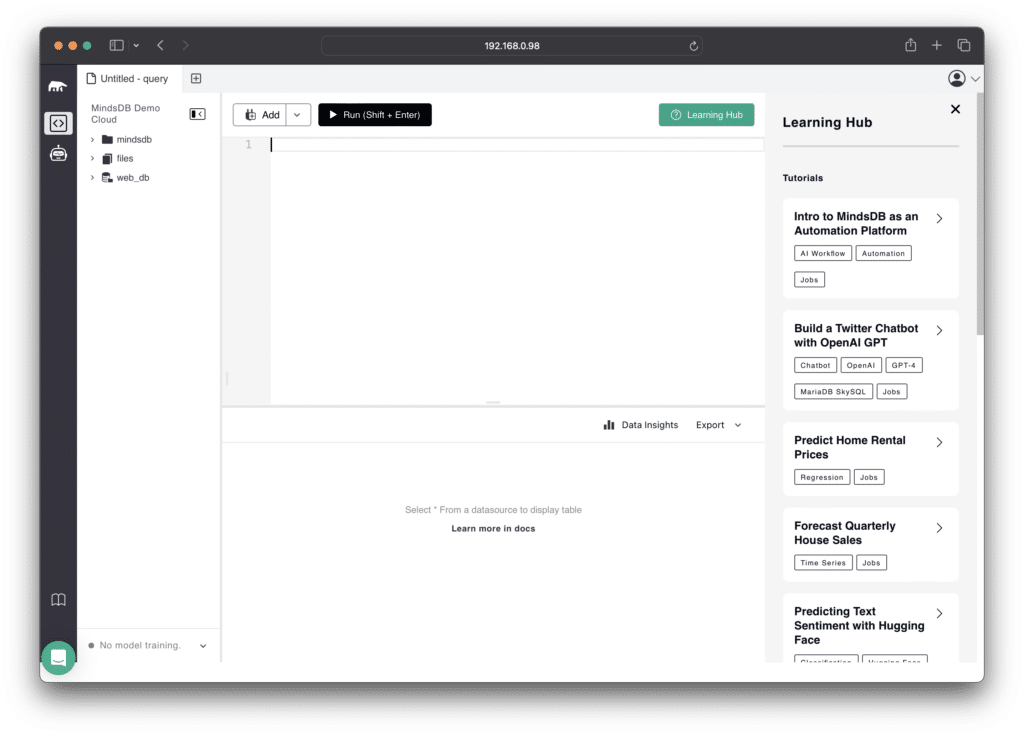
MindsDB provides a very handy web User Interface so we can start exploring our data right away.
As per the docker-compose.yml and in docker ps we can see port 47334, is exposed. From your host machine, point a web browser to 127.0.0.7:47334 or the IP address of the machine where the containers are running.
You should now see fresh MindsDB instance:
Connecting MindsDB to MySQL
Before we can connect MindsDB to MySQL, we need to create a user in MySQL.
First let us open a MySQL command shell:
$ docker exec -it vettabase-mindsdb-intro-mysql-1 mysql -uroot -pSuperPass123Then create a MySQL database user for the sample schema:
mysql> CREATE USER IF NOT EXISTS 'mindsdb'@'%' IDENTIFIED BY 'sampleData_12345';
Query OK, 0 rows affected (0.02 sec)

mysql> GRANT SELECT ON sample.* TO 'mindsdb'@'%';
Query OK, 0 rows affected (0.01 sec)
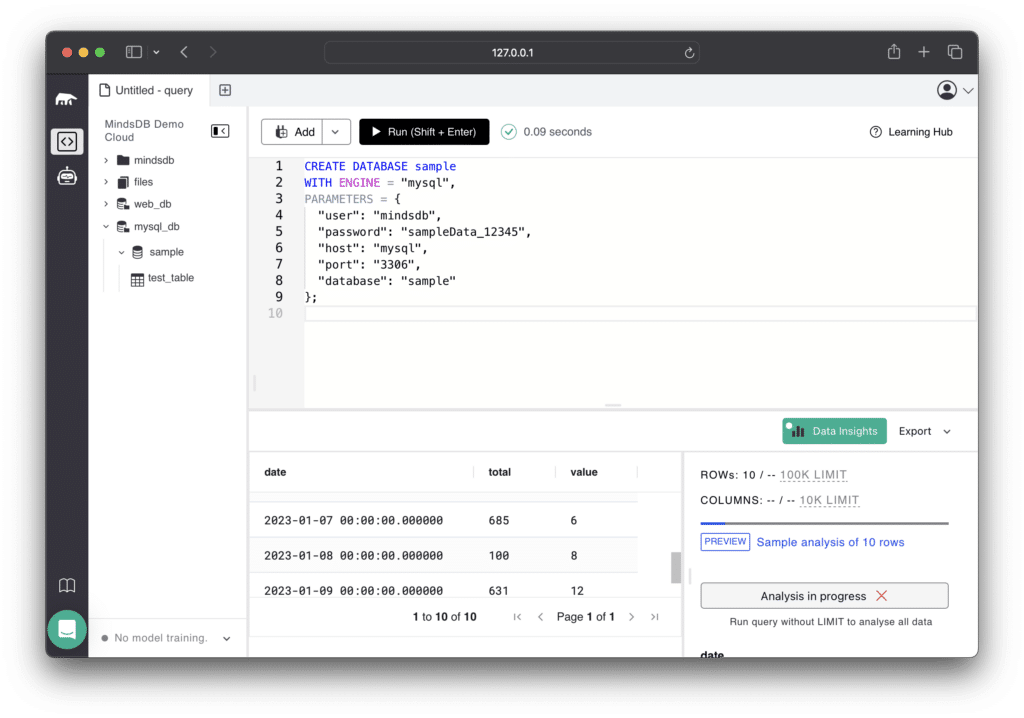
We can now create a connection in the MindsDB web interface using our new user:
CREATE DATABASE sample
WITH ENGINE = "mysql",
PARAMETERS = {
  "user": "mindsdb",
  "password": "sampleData_12345",
  "host": "mysql",
  "port": "3306",
  "database": "sample"
};
Alternatively, you can use the new URL parameter, which was also commited by Vettabase:
CREATE DATABASE sample
WITH ENGINE = "mysql",
PARAMETERS = {
    "url": "mysql://mindsdb:sampleData_12345@mysql/sample"
};
You may notice I have excluded the port number as we are using the default port of 3306 for MySQL, it is not necessary to explicitly set it.
You may already be familiar with adding database specific parameters to your connection details. One enhancement commited by Vettabase was having autocommit on, this means no transactions are left open.
Once the connection has been completed, we can use the sidebar to see what objects have been created and preview the data.
Using the same query as earlier, we can also query our MySQL data directly within the MindsDB interface:
select count(*) as c,
  sum(total) as t,
  sum(value) as v
  from sample.test_table;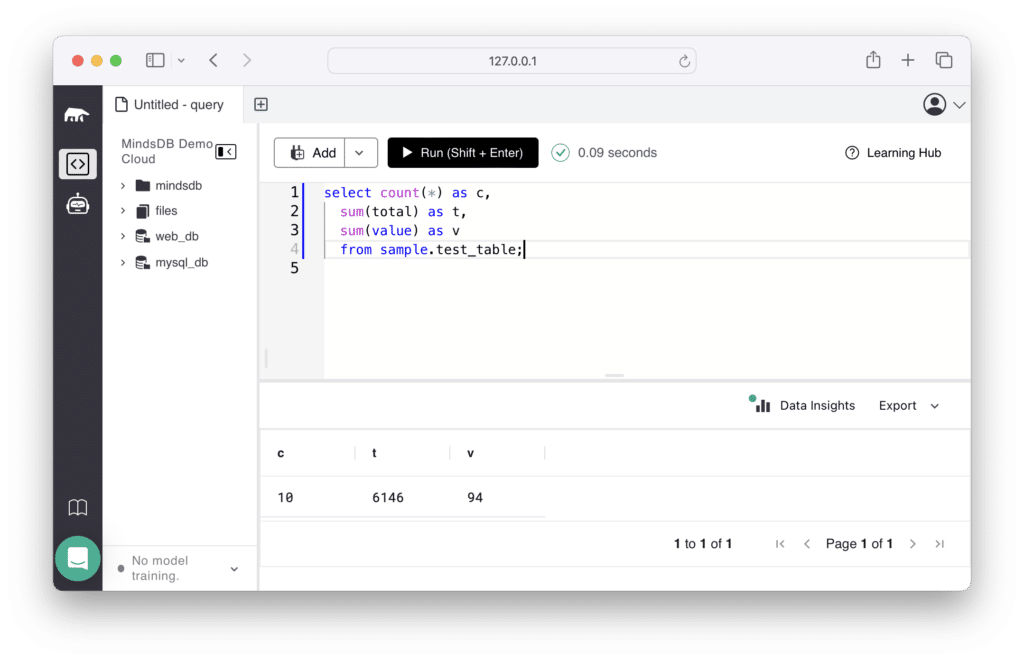
The user we created only has SELECT privileges. If your user also has write privileges (INSERT/UPDATE/DELETE/...) then you can also use the MindsDB interface to edit your database! This is another useful secenario for when autocommit is enabled by default.
Using the methods above you can start by connecting MindsDB to your own data and start building machine learning models.
If you haven’t already, be sure to register for our webinar, Unlocking Real-Time Insights: AI-Powered Forecasting with MySQL and MindsDB!
Richard Bensley



0 Comments